Preface
The realm of 3D printing encapsulates a multifaceted journey, from conception to the tangible creation of objects. Each phase of this process plays a crucial role in achieving impeccable results.Discover a comprehensive tour of 3D printing with machine technology types LCD/DLP/MSLA, using the Chitu system as an example. Parameter configurations, slicing files, initiating a print, post-print cleaning methods, and understanding the nuances of curing with different printer types. Uncovering the intricacies of each stage of the 3D printing process for optimized results. Will provide you with all the solutions to common problems in this article, if there is a problem that is not described in this article, please contact us, we offer lifetime technical support to our customers.
This post is long, so please be patient. Or click on the top right corner of the page to search directly.
Setting Printer Parameters with the Chitu System
When embarking on a 3D printing project, one of the initial steps involves configuring printer parameters using the Chitu system. This includes meticulously fine-tuning settings such as layer height, printing speed, infill density, and temperature. The intricacies of these settings significantly impact the quality and precision of the final print.
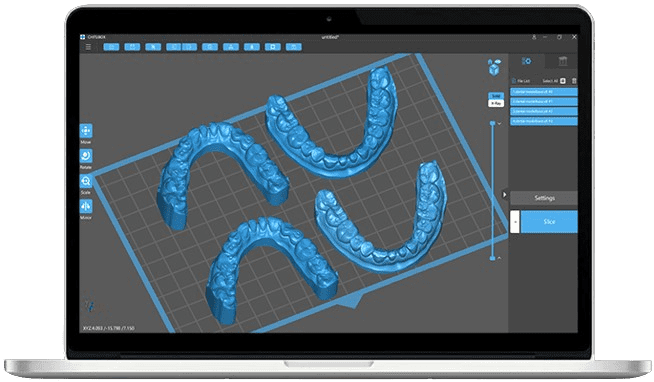
Slicing and exporting files in compatible formats is equally vital. Compatibility ensures seamless communication between the software and the printer, optimizing the printing process.The following is a complete description of the slicing process and an explanation of common problems.
ⅠSetting resolution and print size in CHITUBOX
Generally, manufacturers provide these factory data.and in the case of the Elegoo Mars Pro, we can check that the Build Volume in the specification sheet is 120 x 68 x 155 mm, in addition to a set of 68.04 x 120.96 mm for the display area. Although the difference between the two sets of data is not big, we all know that even the difference of a fraction of a second can cause distortion of accuracy in the XY direction. These two areas can easily cause confusion for newcomers. In fact, the screen area of Elegoo Mars Pro is 68.04 x 120.96mm, but due to the assembly method, the tempered glass of LCD printers will block the edge of the screen when installing in order to avoid the light leakage (in general, this will not happen with DLP printers), which leads to the molding area that can be printed is only 68 x 120mm, but the resolution needs to be the same as the print area. 120mm, but the resolution needs to match the print size (a mismatch will result in image scaling), so the 68.04 x 120.96mm parameter is correct.
Click on the upper left corner of the + can choose the common printers on the market, after the selection of the system will automatically set the appropriate machine parameters.The models built into CHITUBOX are already filled in with the optimal size parameters by default, so you don’t have to have a headache even if you don’t know much about the subject.
For customized or CHITU systems that do not have a built-in printer, it is necessary to obtain the appropriate parameter configuration from the manufacturer. (Setup parameters for NDSpace 3D printers are sent with the order tracking number at the time of shipment.)
Ⅱ-1 Setting print parameters for slicing
-Depending on the printer NDSpace3D’s technology will provide the appropriate printing parameters, so even novice users don’t have to worry!
Because different resins and different raw materials are used, the corresponding printing parameters are set differently. It is also necessary to fine-tune the parameters according to different models.
1)Layer Thickness
Layer thickness is the thickness of each layer of the curing surface, the smaller the layer thickness, the higher the Z-axis precision, of course, the print time is also a letter number growth. Layer thickness can be set in the range of 0.025-0.2mm, with 0.05 recommended, and the minimum Z-axis spindle travel is 0.025mm, so a layer thickness of 0.025 will only be printed below this value. Too large layer thickness is also unreasonable, because the thickness of large may lead to curing light source can not penetrate the temptation, resulting in print failure. It is recommended that the model be placed so that the areas that need better accuracy are in a vertical orientation.
2)Exposure time
Exposure time is the time for each layer to be cured by UV light. A short exposure time will lead to incomplete curing of the model, resulting in model breakage, model splitting into flakes, obvious layer lines on the model, and a soft surface. If the exposure time is too long, it will lead to larger model expansion and increase the printing time. Exposure time has a lot to do with the resin, and the optimal exposure time is different for different resins. To know the optimal exposure time for the resin you are using, you need to seek technical support from the resin manufacturer.
Left: Exposure time is too large and the model is oversized(The correct size should be 2mm)
Right: underexposure time and small model size(The correct size should be 8mm)
3)Bottom Layer Exposure Time
The base layer is the layer that is printed at the beginning of the print run, not the “base layer” in the model’s perspective. The reason for the additional parameterization of the base layer is that it is necessary to make the base layer stick as well as possible to the platform, so that the model does not fall off or even stick directly to the release film. The exposure time for the base layer is generally 15 – 20 times longer than the exposure time for the normal layer. Exposure time is recommended to be more or less, overexposure will only cause the bottom layer to become brittle, over-expansion, difficult to take the mold. And underexposure, it is a direct failure.
The most intuitive way to determine whether the exposure time of the bottom layer is excessive is to observe the supporting bottom layer (without bottom valve) or bottom valve.
As shown in the figure, theoretically the bottom valve side shape is inverted beveled, such as the blue wireframe, if the bottom exposure time is just right or slightly overexposed, then it is the blue or yellow side shape. And if there is a red wireframe this side of the middle of the concave situation, it shows that it has been overexposed, you can reduce the bottom exposure time appropriately, of course, can not care.
4)Number of Bottom Layers, number of transition floors
If we say that in order to ensure that the sticky platform on the first layer, is it only necessary to have enough exposure time to the first layer is feasible? Of course not, a single layer is too thin, the strength is not enough, in our real labeling test 1 layer of the bottom layer will appear in the bottom layer pull deformation or fall off. Therefore, we need to increase the number of base layers to ensure that the initial layer is thick enough to get enough curing. The number of base layers is recommended to be 5-10, depending on the pulling force generated in the model printing, the greater the force, the thicker the layer should be. The number of transition layers, that is, the exposure time of these set layers from the bottom layer exposure time transition to the ordinary layer exposure time. Can be set or not set.
5)Lifting distance, bottom lifting distance
lifting distance and the distance the platform rises when pulling the model. The release film is very elastic, so there may be a model pulled up, the release film is also pulled up, if the lifting distance is small, the release film may not be detached from the model, resulting in printing failure. Therefore, according to the degree of elasticity of the release film and the use of time to set, the looser, the longer used, the distance should be slightly increased.
6)Lifting Speed, Bottom Lifting Speed
Lifting speed means literally. When the platform is lifted too fast, there will be instantaneous large pulling force between the model layer and layer, the model and the release film, which may cause the model to produce cracks, breaks, and the print layer sticking to the release film, or even tear the release film. It is recommended to slow down the lifting speed when printing models with a large area.
7)Return Speed
The return speed generally does not need to change much, it can slow down the return speed can make the resin flow back better. However, it is not recommended to increase the return speed in order to reduce the printing time, which may lead to misalignment of the model, model vote, or even rise and fall too fast, the motor reverses the instantaneous torque, resulting in the Z-axis lost step.
Ⅱ-2 LCD/DLP/MSLA shared accuracy test method is as follows: Adjust the print exposure time to adjust the print molding accuracy
LCD/MSLA:If the ordinary layer printing speed is slow, the exposure time is large, overexposure of light energy, resulting in round holes/cylinders/square columns/flutes; can not be molded or molding size is large, blocking holes; it is recommended that you can appropriately reduce the printing time per layer, such as the original ordinary layer of the printing time of 5 seconds, can be reduced by 1 second to 4 seconds per layer, and so on, and so on, if the precision is still large, you can continue to reduce the exposure time until you get satisfactory precision can be.
If the ordinary layer printing speed is fast, the exposure time is not enough, the lack of exposure energy, resulting in round holes/cylinders/square columns/flutes; can not be molded or molding size is small; it is recommended to increase the exposure time, for example, the original printing time of 5 seconds, can be increased to 6 seconds, if the precision is still small, and so on, you can continue to increase the exposure time until you get the satisfaction of the accuracy can be.
DLP 3D printers, because of the digital reflective light source, the light intensity is greater, better precision, more features, you can also choose to adjust the light source exposure intensity percentage to adjust the precision of printing molding.
If the exposure intensity is large, overexposure of light energy, resulting in round holes/cylinders/square columns/flutes; can not be molded or molding size is large, plugging holes; it is recommended that the exposure intensity can be appropriately reduced, such as the original exposure intensity of 50%, can be reduced to 40%, if the precision is still large, and so on, you can continue to reduce the intensity of the exposure, until to obtain a satisfactory accuracy can be.
If the exposure intensity is not enough, resulting in round holes / cylinders / square columns / grooves; can not be molded or molding size is small; it is recommended to increase the exposure intensity, such as the original print exposure intensity of 50%, can be increased to 60%, if the precision is still small, and so on, you can continue to increase the intensity of the exposure until you get a satisfactory accuracy can be.
Ⅲ Initiating the Printing Process
Once the parameters are set and files are prepared, the printing journey begins. This phase involves the careful initiation of the printing operations, with a keen eye on the initial stages to ensure the printer’s proper functioning and adherence to the specified parameters.
Ⅳ Post-Printing Phase: Model Cleaning Methods
Upon completion of the print, the model undergoes post-processing. Cleaning the printed model is a crucial step, often overlooked but integral for the final product’s quality. Various methods like ultrasonic cleaning, 95% alcohol, IPA, and other cleansing agents serve to eliminate residues and imperfections, readying the model for the next phase.
Attention!
Resin can absorb alcohol and cause swelling or curling. Particularly in the case of fine parts with thin walls and columns, it is not advisable to soak them in alcohol for a long period of time. It is recommended to use ultrasonic vibration cleaning for no more than 3 minutes and to soak in alcohol for no more than 10 minutes.
Ⅴ Nuances of Model Curing
Model curing, although not always necessary for all prints, holds significance, especially for certain printer types. Understanding when secondary curing might be required, particularly for MSLA/LCD printers due to potential light intensity issues, ensures the durability and quality of the finished product. However, DLP printers often boast sufficient light intensity, reducing the need for secondary curing.
Conclusion
The above is the analysis of the parameters of the light-curing print slice, in order to help you better analyze the reasons for printing, in the text of the parameters listed in the settings will lead to the situation, it is recommended that the use of light-curing friends to collect, if there are problems with printing can be ruled out against.The 3D printing process is a meticulous journey involving attention to detail at every stage. From setting precise parameters to implementing effective cleaning and curing techniques, each phase contributes significantly to the final output’s quality and functionality. Embracing the nuances of 3D printing ensures optimized results and opens doors to boundless creative possibilities.
Please feel free to consult us with any questions, we provide professional technical guidance.


I consider, that you commit an error. Let’s discuss it.
Thank you very much for your careful reading! If there are any errors, please submit feedback to us at [email protected] or reply to the comments. We will fix the errors in the article as soon as possible. Thank you very much!
Tell to me, please – where I can find more information on this question?
You can contact us at our official email: [email protected]. We reply to your query as soon as possible!
Very good question
It is remarkable, rather amusing phrase